Showing posts with label rubber stamps. Show all posts

Monday, August 18, 2014

hello, sunshine!


 i'm so happy to celebrate the fun-in-the-sun of this summer


there are lots of great designs to help you
send some sunshine to someone special…...


and tell them how much they brighten your day!!

and p.s. …. thank you SO much for brightening my little spot in cyberspace
every time you stop by my blog!!  sending you lots of these:  xoxoxox!!


{for more information about this "hello sunshine" stamp set,
and other new sets including Christmas stamps,  please click here!}  


Wednesday, August 13, 2014

goin' green


this week, our DLP challenge is to use some of those juicy bits of paper 
that catch all of our creative messes while we're working.
so, i did a nose dive into my trash can and rescued some paper towels that 
had been used to wipe my watercolor palette clean.


then i tore a couple of pieces into circles,
and folded and pleated each one to give it a bit of character.


then i stacked the two circles on top of each other
and sewed some french knots to make sure they stayed together…..


and then i added it to a stem…..


which sits next to a little wooden sign.


and after a bit of reusing and recycling, 
i have a little garden that's goin' green and growin' happy!
:))


{supplies:  moleskine planner, fabriano artistico 140 lb. paper,
paper towels, yellow thread, derwent inktense pencils, 
5B graphite pencil, washi tape, pitt pens, glue dot,

{click here for more information about the DLP challenge!}


Thursday, May 15, 2014

words sweet as honey


the documented life project challenge for this week is
 to use a rubber stamp in a new way, and after thinking about it for a
looong time, i finally came up with an idea!  so, i got out some favorite stamps….


and then i cut a "mask" out of a piece of tracing paper.


then i used washi tape to hold it in place on my watercolor paper…..


and i started stamping inside the opening with
one of the stamps from this stamp set.


i wanted to create something that looks like a vintage bee-keep,
so i used a waterbrush to move the water-based ink around
and then i added a bit more color with a derwent watercolor pencil.


next, i needed some bees for the bee-keep,
so i drew a simple bee shape and then i used one of the heart stamps
from this set to create the wings.
(i also covered part of the bee when i stamped,
since i didn't need the entire heart shape)


then i defined them a bit more by using a pitt pen.


finally, i added all my favorite details, and…..
challenge complete!


{supplies:  moleskine planner, fabriano artistico 140 HP paper, 
"positive strokes" by paper smooches,  crushed curry ink pad by stampin' up,
"i made this" set by technique tuesday, derwent inktense pencils, pitt pens,
5B graphite pencil, white pilot "choose" pen, pan pastel}


Monday, March 17, 2014

inspiration monday


the calendar says that spring is officially here later this week, so let's celebrate by making a little card using some rubber stamps and my favorite "faux watercolor" technique!  all you need are a few distress ink pads, a black stamp pad, a small piece of watercolor paper, some springtime rubber stamps, a waterbrush or paintbrush, and a black marker.
{i'm using fabriano artistico 140 lb CP paper and my new "grow happy" stamp set!}


first, divide the watercolor paper into three sections on the long side, 
and mark the edge with a pencil.
{my paper is about 8"x4", so i marked at 2-5/8" from each end}


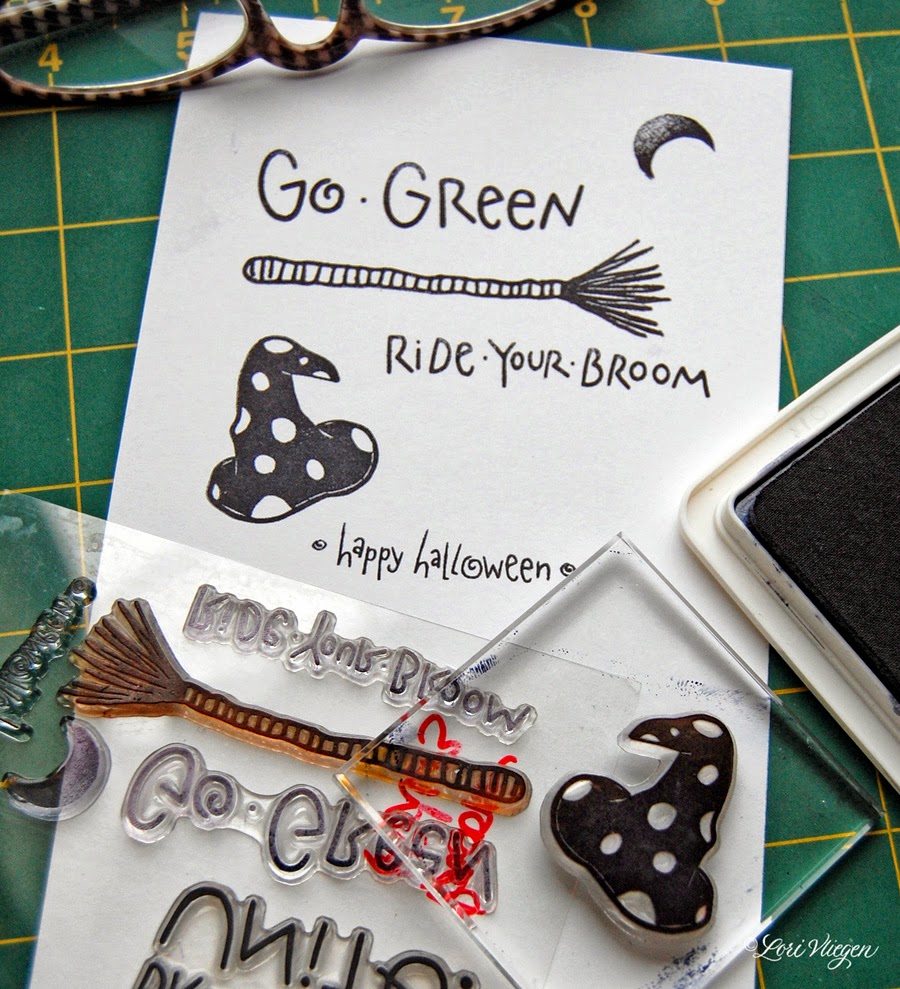
now stamp your images using a water based ink pad.
{i used distress inks by ranger}  


touch a wet paintbrush to the ink to "paint" your image.  
the water will activate the ink and you can move it around to create a watercolor effect.  


if the image starts to disappear, you can fix it once everything is dry by dabbing your paintbrush directly onto the stamp pad, and then painting the details back in.


now stamp a cheerful sentiment using black ink….. 
and add a border, if you like!


place a ruler on the pencil marks, and use a bone folder 
to score from edge to edge across the front.


now fold the paper along the scored lines into three sections…..


and write your own happy springtime message!


now just tuck your sweet greeting inside an envelope and share it with someone special!
celebrate those warm, sunny, springtime days ahead!!  woo hoo!

{i found these little polka-dot glassine bags at michael's and the card fits inside perfectly….i just love it when that happens, don't you?!} 


{i used these supplies to make my card:  
fabriano artistico 140 lb CP watercolor paper,  "grow happy" stamp set, distress ink pads, black archival ink pad, waterbrush, micron pen, ruler, bone folder, pencil}


Monday, February 3, 2014

inspiration monday


there's something about playing with rubber stamps that always inspires me.
but this time instead of using them to create a card, i thought i'd use them in my small moleskine journal , and i started the fun by stamping this large stamp.


then i decided to stamp some of the smaller hearts and paint in those blank spaces.


once they were painted, they still looked a little bare, so i jazzed them up a bit with some doodles.


but when you're having fun with hearts, it's hard to stop at painting just one…..


so now i have a journal page filled with some doodly-heart-goodness,
all inspired by some rubber stamps…..and my little dutch sweetie!


{supplies:  moleskine journal, Technique Tuesday rubber stamps, watercolor pencils,
pitt artist pens, 2B and 6B graphite pencils}


Thursday, November 21, 2013

keep calm and be challenged


i was playing with one of my new rubber stamps the other day,
and i decided to challenge myself to finish a journal page
without using my pitt or micron pens.


at first, i thought it wouldn't really be that hard to give up just one supply….
but as i got further along, i realized how much impact those black pens provide!


once i was finished, i decided it was a lot of fun doing something completely different, and i really like the way it turned out!  well, except that the stamp image isn't centered…..but that's an entirely different
trying-not-to-be-so-obsessive challenge that i'll deal with another day.  :))


{this was created in my moleskine journal using derwent watercolor pencils,
 "believe in miracles" stamp, and pigment stamp pad}


Monday, October 21, 2013

inspiration monday


halloween is right around the corner, and i've been dreaming about my favorite part.....the chocolate  candy!  but the mere mention of it makes my jeans a little tighter, so here's a hip friendly "sugar" project using a mini white pumpkin, glue, strong double-sided tape, rubber stamps, card stock, and some extra fine glitter.


first, put a line of glue in the creases of the pumpkin and shake a generous amount of extra fine white glitter until the glue is completely covered. (you can also use glitter glue, but getting glitter everywhere is half the fun!)


make sure this is done over a piece of paper so the excess glitter can be placed back in the container and used again.


while the glue/glitter is drying on the pumpkin, stamp a fun image onto cardstock.


now place double-sided tape onto the stamped image.
(i used wonder tape, but it wasn't wide enough, so i placed two pieces next to each other)


cut out the image.
(using non-stick scissors makes this a lot easier!)


remove the protective covering from the tape, and sprinkle the white glitter over the image until the entire surface is covered.  shake off the excess.


now the image looks sugar-coated!  use a small punch to make a hole at the top, and place some twine through the opening.


now tie your sugar-tag onto your glitter pumpkin,
and you have a subtle, but very hip-friendly-and-sparkly-sweet decoration for halloween!


{supplies:  mini white pumpkin, glue, extra-fine white/clear glitter, white cardstock, hole punch,"boo" stamps by technique tuesday, black stamp pad, wonder tape, non-stick scissors, twine}


Thursday, September 26, 2013

boo-fun


i was looking at the calendar yesterday.....it's almost october already!!
eeeek!  and when i think of october, i think of stuff that goes "boo",
in a fun, whimsical sort of way.....and nothing's more fun that some boo-play!


so i got out some boo-supplies, and turned this.....


into this!


and this.....


into this....


and this!!

i hope your weekend is filled with lots of boo-fun-and-whimsy!!  :))


{these projects were created using my new stamp sets from technique tuesday....woo hoo....along with card stock, patterned paper, stamp pads, embossing powder, twine, and paper punches}


in other fun stuff......
there's still time to put your name in the hat for the online class giveaway at creative workshops!  just click here.....giveaway ends on sunday evening!

and....my dear, precious friend martha is sharing some great news about her entrepreneurial son, zach!!  he has started his own company and has won some great awards here in jacksonville already!  if you'd like more information about some awesome upscale guitar accessories, please click here (we're talkin' fabulous guitar straps made in peru and lots of other terrific items!)


Related Posts Plugin for WordPress, Blogger...