Thursday, November 28, 2013

thankful hugs


we're celebrating Thanksgiving here in America today,
but no matter where you live in this big-while-small-at-the-same-time world of ours…..


please consider yourself thought of…..and thanked beyond measure…..
for all your visits to my little corner of blogland, and all of the tremendously kind comments you leave here.   your love, friendship and support of my artwork mean more than i could ever properly put into words, so please accept the enormous hug of thanks that i'm sending to you right this very minute!!

happy Thanksgiving to sweet, precious, wonderful YOU!
xox


{this was created in my wings journal using derwent inktense pencils, pitt pens,
white pilot choose pen, 3B graphite pencil}


Monday, November 25, 2013

inspiration monday


 this jumbled up paper mess is my "inspiration file".  and that rubber band holds it all together.  nice, huh?  it started out as a moleskine cahier,  but as soon as i filled it with favorite quotes, the notebook began to morph into a holder for little bits of paper and other ephemera.
 anyway, i was looking through it the other day…..


 and i came across an article i tore out of a family circle magazine…..back in 2005!  i was so inspired by it at the time, that i had placed a sticky note on it with an idea for a little accordion booklet.  fast forward eight years :)) , and i decided it was about time to put my idea into action!


first, i cut out ten "pages" using this pocket gift tag die and my cuttlebug, along with some scrapbook papers by heidi grace.  then i folded up the bottom flap and glued the side tabs to create a pocket at the bottom of the tag.


next, i turned the "pages" over and joined them together with a piece of washi tape.
(i taped an acrylic block to my cutting mat to help keep the bottom edges lined up.) 


once all the pages were taped together, i had an instant accordion booklet!


to create my little "rejoice tags" for the pockets, i cut out rectangles from a piece of striped vellum and wrote things i'm thankful for onto each one using a pitt artist pen.


once i had lettered ten tags, i stapled a piece of ribbon to the top edge, and glued a number onto each one.  


the only thing left to do was make a front and back cover!  i used the same die-cut, but this time i trimmed off the pocket at the bottom.  then i created a title on coordinating paper.


next, i placed a sheer ribbon on top of the cover, and used foam dots to attach the title over the ribbon. after adding some black and white baker's twine to the top of the pages, i attached the front and back covers to the rest of the booklet using the same washi tape method.


lastly, i tucked my little tags into each pocket, and eight years later, my project is finally complete!!  woo hoo!  definitely a reason to rejoice!!  :))


{supplies:  heidi grace scrapbook paper, cuttlebug, memory box pocket gift tag die, ribbon, vellum paper, tombow mono multi glue,  pitt pens, 6 B graphite pencil, washi tape, baker's twine, foam tape} 


Thursday, November 21, 2013

keep calm and be challenged


i was playing with one of my new rubber stamps the other day,
and i decided to challenge myself to finish a journal page
without using my pitt or micron pens.


at first, i thought it wouldn't really be that hard to give up just one supply….
but as i got further along, i realized how much impact those black pens provide!


once i was finished, i decided it was a lot of fun doing something completely different, and i really like the way it turned out!  well, except that the stamp image isn't centered…..but that's an entirely different
trying-not-to-be-so-obsessive challenge that i'll deal with another day.  :))


{this was created in my moleskine journal using derwent watercolor pencils,
 "believe in miracles" stamp, and pigment stamp pad}


Monday, November 18, 2013

inspiration monday


here's a fun, easy way to add some autumn flair to your journal page!
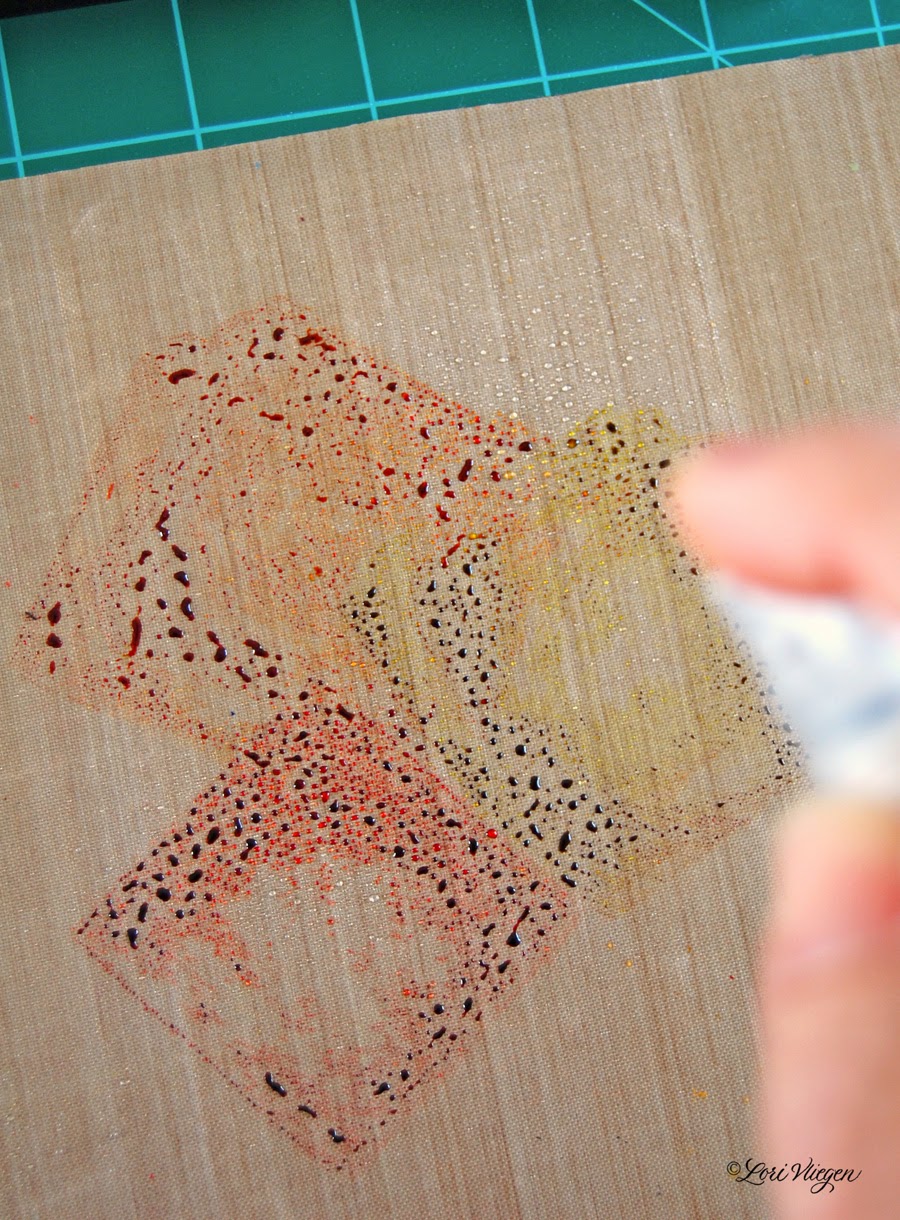
start by carving a solid leaf stamp (i carved this stamp from a plastic eraser).


then smoosh three different colors of distress ink onto a smooth, non-porous surface.


now spray a very fine mist of water onto the ink…..


and press your stamp into the ink, trying to include all three colors.


now stamp your image onto your journal page.  


you can fill in some of the white areas by using your water brush to smooth out the color……


and you can also use the leftover ink on your craft sheet to paint in other important things on your journal page.


then, once you've added all your favorite journal-touches,
celebrate these crisp autumn days by making yourself a big cup of hot chocolate!
(p.s.  and make sure you put plenty of those soft, ooey-gooey, mini marshmallows on top!)


{watch me carve a stamp here}

{supplies:  moleskine watercolor journal,  plastic eraser, carving tools,  distress ink stamp pads in fired brick, rusty hinge, and crushed olive, craft sheet, waterbrush, 6B graphite pencil, sepia pitt pens}


Thursday, November 14, 2013

a sketchbook, some wisdom, and tape man


meet Joop.
he's the creator of "tape man".
drawing is one of his favorite things to do.....
and he also gives really great advice.

{oh, and he'll absolutely steal your heart.  no doubt about it.}

you can watch this in larger format here.


Related Posts Plugin for WordPress, Blogger...