Thursday, December 19, 2013

Merry Christmas!


i'd like to take a moment out of all this holiday hustle and bustle
 to thank you SO much for your visits to my blog,
your sweet encouragement,  and your heartfelt comments this year!

i hope you have a very blessed Christmas
and a fabulously creative 2014!!
xox


{i'll be away from blogland for a while
to spend some holiday time with my family…..
see you on january 2nd! }

{supplies:  moleskine watercolor journal, derwent inktense pencils,
pitt pens, 6B graphite pencil, stickles glitter glue}


Monday, December 16, 2013

inspiration monday


i was wrapping some gifts the other day, and found myself so inspired by the colored tissue paper i just had to figure out a way to add it to a journal page!  so i started cutting it up into random shapes…...


and used a glue stick to glue them down onto my journal page.


and after a bit more glueing and some play with a pitt pen…..


i had a fun, colorful page in my journal,
compliments of some gift wrap and a glue stick!
'tis the season for inspiration!  :))


{this was created in my moleskine journal using colored tissue paper, glue stick,
pitt pens, pan pastel, 3B graphite pencil}


Thursday, December 12, 2013

time out


i absolutely love this time of year,
but it's easy to get a little overwhelmed by a to-do list that's
 growing larger than my chocolate-inspired-hips.


so my favorite remedy is a quick stroll on the beach.


there's no hustle and bustle here, no black friday, no cyber monday….


no long lines, and no searching endlessly for a parking spot.


 there's only mother nature doing what she does best…..


putting life back into perspective, one roll-of-the-waves-onto-the-shore at a time.


here's to a peaceful weekend, sweet friends!
xox


Monday, December 9, 2013

inspiration monday


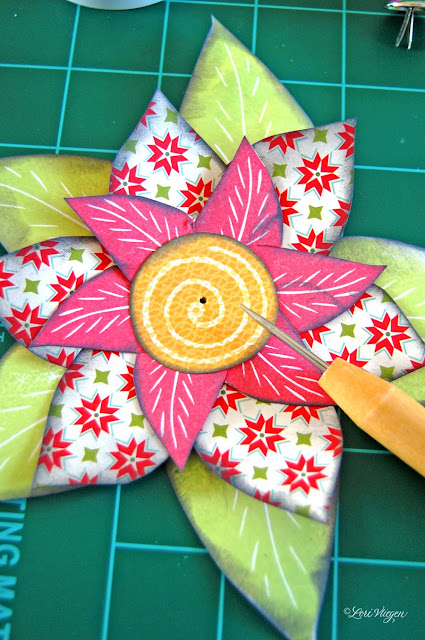
i was looking through my journal and came across this poinsettia page from last year, and i started to wonder what would happen if i took that idea a step further.  so i grabbed the same handcarved leaf stamps that i used last year, along with some stamp pads, scrapbook paper, scissors and decorative brads.


the first thing i did was stamp an image of each leaf into a flower pattern on the back of a piece of scrapbook paper.  the nice thing about doing this on scrapbook paper is once they're stamped, both sides are decorated, and it's fun to play with the patterns together.  


then i cut out each flower.


next i added a bit of dimension by rubbing a charcoal stamp pad on the edges of the paper.


then i stamped a round carved stamp onto scrapbook paper and cut it out on the outside edge.


after all the layers were arranged and stacked on top of each other, i punched a hole through everything…..


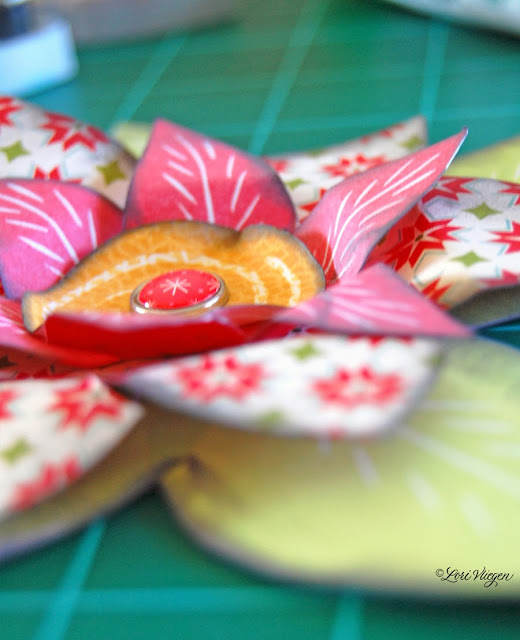
and inserted a brad to hold it all together.  then i folded and curled up the petals to help bring it to life.


lastly,  i wrapped a piece of baker's twine around the prongs of the brad on the back…...


and attached it to the top of a package for someone special!


time spent looking through your journals
is one of the nicest gifts you can give yourself….
you'll be amazed at all the wonderful inspiration that's waiting to be found!


{supplies:  handcarved stamps, stamp pads, scrapbook paper, scissors, decorative brad, baker's twine}


Thursday, December 5, 2013

heartfelt cheer


take a blank canvas...


and grab a handcarved stamp covered in green ink.


add a heartfelt message….


and you've got a holly-jolly reminder of good cheer the whole year through!
:))


{supplies:  walls notebook, handcarved stamp, stamp pad, pitt pens,
derwent inktense pencils, pilot "choose" white pen, 8B graphite pencil}


Monday, December 2, 2013

inspiration monday - Christmas notepad printable


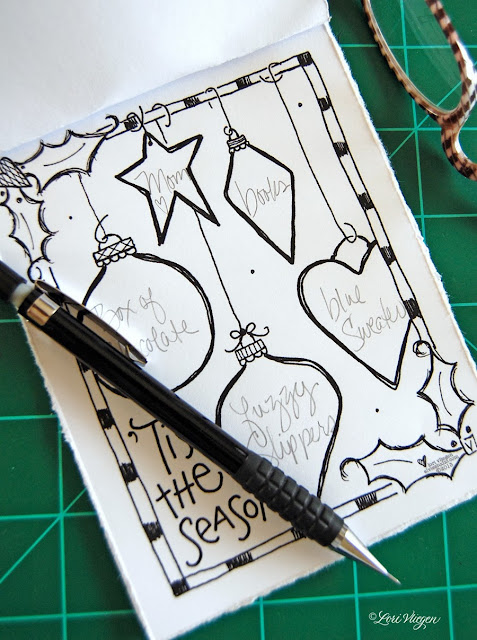
'tis the season to be holly, jolly, merry…..and busy!  so i've created a fun notepad printable to help get some of the busy-ness organized!  here are two ways you can use it…..

idea #1:  use this notepad as a little gift registry by printing out a page for each person you're shopping for.  then cut or tear on the light grey border lines and down the middle.


stack the pages on top of each other and punch two holes at the top through the entire stack.


  thread baker's twine or ribbon through the holes to hold it all together.
{optional:  cut a front and back cover from card stock and add a message to keep others from peeking!}


now add the name of the recipient to the star, and then write gift ideas, sizes, color preferences, etc. in the other ornaments.  it's the perfect size to tuck in your purse, so you'll have all the necessary information when you're out shopping.  and don't forget to carry some colored pencils or markers with you to add a pop of color to the pages while you're waiting during appointments!


idea #2:  use this printable as a cover for your to-do list.  print out onto card stock or watercolor paper and cut or tear on the grey border lines and down the middle.   use markers, watercolor, or colored pencils to finish the design (if you're a zentangler, these spaces are the perfect doodle playground!).


 cut several pieces of paper approximately 4.25" x 6" and then stack on top of each other, with your colored cover on top.  {optional:  you can also cut a back cover from card stock to add more stability}


punch two holes at the top through the entire stack of paper and weave baker's twine or ribbon to hold everything together.  now you have a space to jot down all those holly-jolly notes, errands, and fun stuff you want to do!


whichever project you choose, i hope this printable helps to make your season more organized!  to get started,  click here for the printable file!


{this printable is copyright lori vliegen and is for your personal use only.  please do not alter or distribute in any manner whether digitally or manually, submit to a publication, or use commercially in any way.  thank you!}


Related Posts Plugin for WordPress, Blogger...