Showing posts with label garden. Show all posts

Tuesday, September 23, 2014

splatter-happy


this week, DLP put out the call for drips and splatters on our journal pages,
so i got busy and pulled out some "drips and splatter" supplies like
watercolor paper, a spray bottle, water-soluble inks, and a ranger craft sheet.
but if you're like me and you don't really want to make a huge splatter mess,
here's a way to "reverse" the process…..


swipe some water-soluble ink across
 your craft sheet (or other slick, non-porous surface),
and spray it well with water using a mini-mister or spray bottle.

{for this step, i used peeled paint and scattered straw distress ink pads}


now lay your watercolor paper on top of the ink
and slightly smoosh it around.


then, lift your paper off your craft sheet and hold it up
so the ink will drip down the paper.


let your paper dry, or speed things up by using a heat gun,
and then pat your paper down into the same ink on your craft sheet.
this will give your "drips and splatters" a layered effect.

you can do this process as many times as you like...
just make sure the paper is completely dry in between steps.


you can also use water-soluble markers…..
just swipe them across the craft sheet and spray well with water.
then, lay your paper into your juicy ink slurry, lift it off the sheet,
let it dry, and repeat for a layered effect.

{for this step, i used tombow markers,
and i just dabbed my paper into the ink instead of smooshing it}


once your splatters have dried, it's time to play a game of "i spy"!
look at your paper for any particular shapes that jump out at you.
then take a waterproof marker and start
outlining, drawing, and embellishing your shapes!


you can also swipe some marker onto your craft sheet or acrylic block,
then pick it up with your waterbrush……
fill in and smooth out any areas to help your shape stand out better.


when you're happy with the way your splatter-shapes look,
then, it's all about adding your favorite finishing touches….


and before you know it,
you've gone splatter-happy without all the mess!
{or at least without most of the mess! :))}

♥♥♥♥♥

i'm very honored and excited to have been invited by the
Art to the 5th team over at Documented Life Project
as this month's Spotlight Artist!!  woo hoo!!
i'm absolutely thrilled to have my artwork featured,
and i thank the Art-gals SO much!!  xox

please join me here to see my interview!


{this journal page was created for the week 39 DLP challenge.
supplies:  moleskine planner, arches 140 CP watercolor paper, 
distress ink pads, tombow markers, spray bottle, ranger craft sheet,
white sharpie paint pen, pitt pens, black permapaque marker,
graphite pencils, washi tape}


Thursday, October 10, 2013

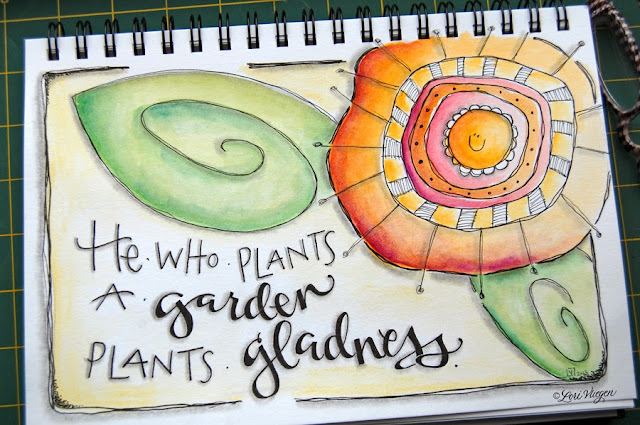
garden of gladness


plant a little seed of happiness, 


and give it lots of tender loving care,


and before you know it, you'll have a gladness garden of
feel-good-from-your-head-to-your-tippy-toes-flowers everywhere!
xox


{supplies:  stillman&birn beta series journal, koi watercolor, micron pens,
derwent watercolor pencils, 6B graphite pencil}


Thursday, July 25, 2013

biltmore gardens


this past weekend my little-dutch-sweetie-boy treated me to another getaway to biltmore house.  for so many reasons, it's one of my most favorite places ever (the estate is gorgeous, i love the story of george and edith, and it's hard not to think of downton abbey as you're soaking up the splendor of it all....).  and as fabulous as the house is, the gardens are equally spectacular.....you could probably spend an entire week strolling through the lush flora and fauna and still not see it all.....  


so i tried to capture some of mother nature's marvels in my journal.....
to remind me of a perfect weekend spent with my perfectly wonderful guy!

thank you, dutch-sweetie....
you make all my days happily-ever-after days!!  xox


{this biltmore artwork was created in my moleskine journal using koi watercolor,
derwent inktense pencils, pitt pens, and a 6B graphite pencil}


Thursday, September 6, 2012

green, pink, yellow and brown


it's amazing what you can find in your
very own backyard!

i hope this weekend offers you lots of time
to enjoy the beautiful things around you!
xox


Monday, April 30, 2012

inspiration monday


here's another fun way to create a "faux watercolor",  
without having to get out your watercolors!  
all you need are some water-soluble markers,  a paintbrush, 
a mini mister, a pencil, a piece of watercolor paper, and your 
favorite solid stamp (i'm using a hand-carved circle stamp).


using your markers, scribble some color onto your watercolor paper.  
try to keep your colored area a little smaller than the size of your stamp.


now spray a light mist of water onto the surface of your stamp
{the more water you spray, the less vibrant your image will be}......


and press it onto the colored area of your paper.


the water will activate the pigment of your water-soluble markers 
and create a really cool looking watercolor image!


now you can add some details, if you like......


and you can also add to your design by using some different colors......
 just activate the pigment using a damp brush
{a waterbrush is perfect for this!}.


when you're finished putting all your favorite touches on it,
you've got a sweet little watercolor bliss.....
without the watercolor!


{supplies:  strathmore 140lb. watercolor paper, 4B graphite pencil,
tombow markers #856, #933, & #158,  mini mister, water brush,
hand-carved circle stamp using speedy carve,  pink pilot hi-tec-c pen


Wednesday, December 7, 2011

garden gifts


in all the hustle and bustle of the holidays, mother nature is quietly going about her business and gifting us here in north florida with simple pleasures.


this explosion of december pink and yellow is such a treat in my back-porch-garden.....


and it looks like there's lots more to come!

{camellia japonica}


Monday, November 14, 2011

inspiration monday


i can't think of a more perfect way to end a wonderful pottery barn journal adventure than by adding this final sketch of a fabulous little garden bistro!


a quaint little bistro tucked away in a secret alcove somewhere (maybe even your back porch!).....with aromatic lemon trees growing out of ornamental clay pots, placed next to stylish chairs that are adorned with orange-stripey cushions to sit on.   and it's all so inspiring, why not indulge in a special little drinkie (you know, the kind that comes in a special little wine-shaped bottle?!).


 many of you have commented that you'd like to see this journal from cover-to-cover, so i made this video......you can watch it here in larger format, if you like!

thank you, pottery barn, for the many wonderful hours of enjoyment and inspiration you've given me in creating this special journal!  and thanks to all of you bloggy sweeties for inspiring me to create the video!!  xox

{journal page created using koi watercolors, micron pens, graphite pencils, 
uniball signo white gel pen}


Wednesday, May 25, 2011

sweet simplicity


the little cherry tomatoes i've been nursing for the 
past several weeks are starting to show their colors......


and red never tasted so fabulously sweet!
celebrate the simple things today!


Friday, April 29, 2011

le jardin


i hope you have a magnificent weekend......
filled with lots of time to dream creative dreams as you're
 walking through secret gardens.....

enjoy!


p.s.  my sweet aussie friends elaine and lisa at destination art invited me over for a little chat today!  you can read it here.....and while you're there, treat yourself to a look around at all of their fabulous artwork!  thanks again,  elaine and lisa!!


Monday, February 14, 2011

inspiration monday


here's an easy way to grow your own journal garden!  first, grab all of your favorite paper punches (you can also cut shapes by hand)......


and some of your favorite papers.


punch out a circle, and stamp or write a word in the center.
(i distressed the edges of my circles with a stamp pad)


use adhesive to attach some "petals" to the back of your word circle 
(i used a tape runner, but glue will work too).....


 then add some fun little doodles and a paper stem, and you've got a flower!


add some more flowers to the mix (you can never have too many of these little cuties!), attach them to a colorful journal background.....


and you've got yourself a happy little inspiration garden!!
have fun, valentine sweeties!

click on images for larger view
supplies used:  rubber stamps, staz-on ink pad, assorted papers, assorted paper punches, green marker, micron pens,  uniball signo white pen, pan pastel for background


Saturday, April 17, 2010

child of art quilt


i have had an absolute blast the past few days just playing......with some fabric, ribbons, threads, beads, and batting. if there ever was a piece of art that totally describes my creative comfort zone, i think it's this one. and while most of these materials were familiar to me......


i used inspiration from my sweet friend becky shander and tried something new.....i painted some dryer sheets and created these sweet little flowers (SO much fun!!).....


but you know with me, it always starts with the lettering......that will forever be at the center of this child of art's heART!


in working on this, i've learned that thinking outside the creative box is important, but taking some time to revisit my comfort zone has given me a new energy that i desperately needed. here's to being back in the zone!!


Tuesday, November 17, 2009

in the garden


mother nature never ceases to amaze me......while many areas of our country are celebrating the oranges, yellows and browns of fall leaves, my camellias are quietly blooming on the back porch.


and it looks like the bees are enjoying the explosion of pink and yellow, too!!


Related Posts Plugin for WordPress, Blogger...