Showing posts with label screen printing. Show all posts

Monday, July 29, 2013

inspiration monday


this past weekend i did something that i've wanted to do for a really long time.....
i took a screenprinting workshop!  and boy, did i ever luck out, because instead of having only one instructor, this class was taught by silkscreening dynamic duo dana fehsenfeld and kreh mellick at barbara zaretsky's fabulous cloth-fiber workshop studio!
we got things started by looking for some design inspiration (i chose these little tick-marks from my journal).....


and then we used waterproof markers and drew onto a large piece of acetate.


there are lots of different ways the screen design can be set up.....
i decided to draw two different designs,  which gives me the option of taping off one side and printing one design at a time if i want (kind of like having two different screens, but it's all on one).


then the design was burned into the screen.....
dana had already prepared our screen with the pink photo emulsion, and then we placed it with our design acetate on top onto a UV screen exposure light box.  after only a couple of minutes, we quickly washed out our screen and watched our design come to life!
then we let the screen dry outside.


then came the fun part.....the printing!
i decided to print the leaf design, so i taped off the other side.  then a nice dollop of blue paint went at the top, and i squeegueed it down through the screen onto my white fabric.....


and presto,  lots and lots of blue leaves all in a row!


then it was time to hang it on the line outside.....


and while one fabric was drying, i printed some more!
this time, blue tick marks onto khaki fabric.....
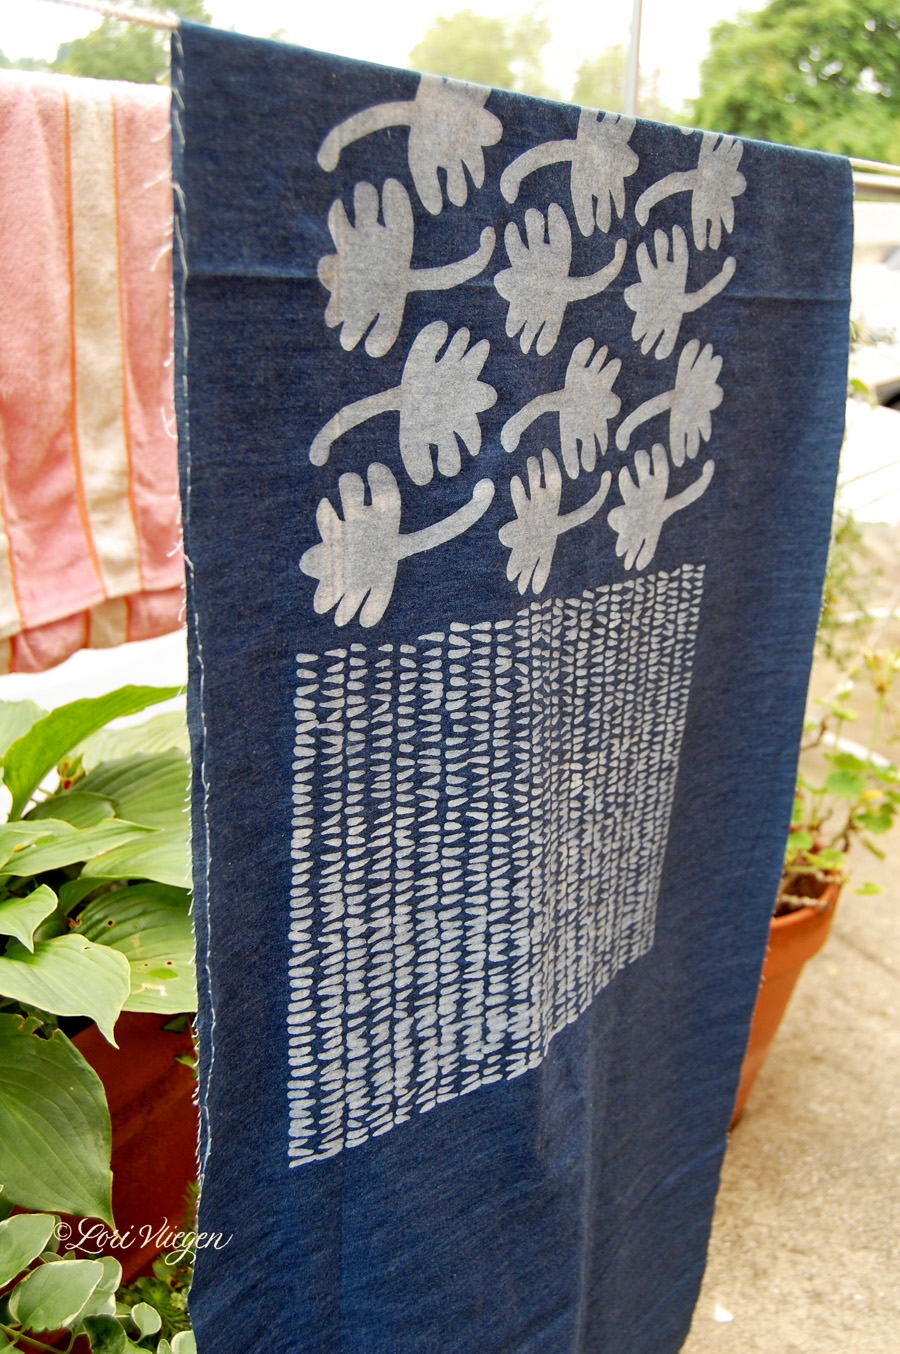


and white onto denim!


before i knew it, i had a nice little stash of screenprinted fabrics started.....
and i can't wait to add some more!

many thanks and big hugs to dana, kreh, and barbara for a truly fabulous weekend!
i loved every minute of it!!

{click here to see more about the screenprinting process!}


Monday, February 6, 2012

inspiration monday


 i have long wanted to do some screen printing (and you know i even have some of the supplies!), but it always seemed a little overwhelming when it came time to get started......i was definitely looking for a simple way to get going!  and after a little cyber-searching, i think i found it......here's one way to do it:
with some help from this you tube video by expertvillage,  make a screen using some sheer curtain fabric and an embroidery hoop (i'm using a 10" plastic hoop.  you can buy the fabric at your local fabric store, or you can also buy an inexpensive sheer curtain panel at a discount store.).......


and then choose your favorite plastic stencil 
(make sure it's not larger than the opening of your embroidery hoop).


place your stencil on top of a piece of paper, and then "mask" the area around
 the stencil using some freezer paper or waxed paper. 
(i'm printing onto a piece of kraft card stock from the tim holtz idea-ology line)


now place your screen on top of your masked stencil and lay some paint 
at the top of your screen, above the paper and stencil.
(i'm using some white screen printing ink by jacquard.....i think it was a little thick, next time i'll thin it down with a bit of water.  you can also try this using some tube acrylic paint.)


using an old credit card, piece of mat board, or a small squeegee, move the ink down from the top to the bottom of the screen.  you want to end up with an even layer of ink over your stencil.


now carefully lift your screen and stencil,  and take away your paper mask......
and you're left with a really cool screen printed image!  


once your ink is dry, you can trim your image down and add it to your journal, create some personalized stationery, or make a little card for someone special!


and you can use some pan pastel or colored pencil to add a pop of color, too!


some things i noticed:


* this is really easy! the only time consuming part is setting everything up.

* my ink took a while to dry......i think my paint was way too thick.

* make sure you have some newspaper nearby to lay your inky screen and stencil on.
you'll probably want to keep some paper towels close, too.....along with your trashcan!

* rinse off your screen and other tools as soon as you're finished.....
you don't want the ink/paint to dry in your screen.

* the printed image will have a fun texture because of the fabric.

* you can print lots of images in no time at all!


{supplies used:  sheer curtain fabric, plastic embroidery hoop, plastic stencil, 
jacquard screen printing ink, tim holtz idea-ology card stock, plastic squeegee, 
white card stock for card, shipping tag, sepia pitt pen
4B graphite pencil, pan pastel, ribbons}


Related Posts Plugin for WordPress, Blogger...